I recently found out that a lot of Windows 10 users were losing their files because they weren’t regularly backing up their files and folders. While cloud storage is one backup option, it will cost you something every month based on which service and what plan you opt for. There’s also a much cheaper way to get this done. And the best part is, Windows 10 has this functionality built in. You just have to know how to set it up first.
First of all, you’ll need an external memory device. It doesn’t have to be like a massive 5 TB hard drive or anything, even a simple USB drive will do. But that depends on what kind of files you regularly work on. If you’re just using Word and the occasional spreadsheet on Excel, a USB drive will do just fine.
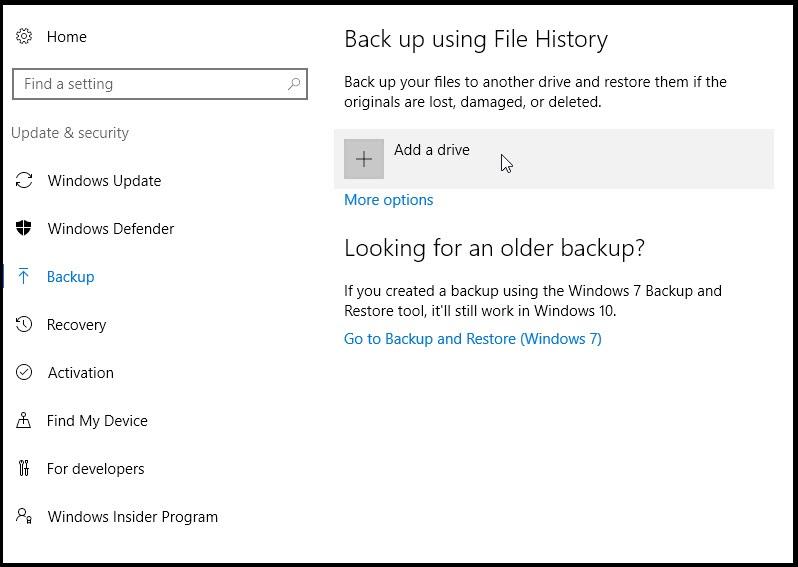
After connecting the device – it can even be a Network Attached Storage or NAS drive – go to the Start menu and click on Settings. Under ‘Update & security’ you should see something called Backup. Click on it and you’ll be asked to ‘Add a Drive’ at the beginning of the ‘Back up using File History’ section. Click the + symbol and add the external device or NAS location from the options shown. If you don’t see it that means the drive is not properly connected. Hook it up properly and get to this step again.
Now that you’ve added the device, you’ll need to tweak some other settings. Once the drive has been selected, you’ll see a toggle switch showing ‘Automatically backup my files’ and then an ‘More options’ link right below it. That’s where you can specifically choose while folders the backups need to be created from, as well as other settings for this feature.
After that, you’ll need to set the backup frequency, and select the option you need. If you use your desktop or laptop for more than a few hours a day creating documents and so on, a higher frequency is recommended. But remember that each time the backup runs, it uses system resources so you could be left wondering why your system is slow every 10 minutes!
There’s also an option to backup all files from the chosen folders immediately. You’ll probably need to do that the first time you’re setting this up so all your existing files get backed up.
The next time you find that you’ve lost an important file or that it’s corrupted in some way, go back to Settings -> Update & security -> Backup and scroll down to the bottom of the File History window. You should see something called ‘Restore files from a current backup’ – click that link and it will open a popup window of all your backed up files. Choose the one you want, and then pick the option – replace it to the old destination, skip the file or compare file attributes. Replace puts the file back where you originally had it.
This feature is not new to Windows 10. In fact, it’s been around ever since Windows 8 came out, and even Windows 7 has a sort of roundabout way to get this done.
Backups are very important, but few people realize how much trouble they can save by just spending a few minutes preparing for the worst. Not only do backups help you find lost or corrupted files, but they’ll come in handy when you’re doing an operating system upgrade or any other major change to your system.
I hope the information provided here helps.
Thanks for reading our work! Please bookmark 1redDrop.com to keep tabs on the hottest, most happening tech and business news from around the world.