Mac OS X is a great operating system, but it has its flaws just like Windows. Perhaps not as frustrating as some of the issues seen with the Windows OS, but when it hits it can inconvenience you to no end. In this article, we’ll look at a very useful tool called Disk Drill partition recovery software for Mac.
What are partitions or volumes on Mac systems?
Like Windows machines, Mac OS X organizes disk space into volumes or partitions so it can manage the information in these partitions separately. They’re also called logical disks, and they use parts of the actual physical disk in your machine.
The principle is essentially the same for any operating system. Mac OS X uses what is known as a Hierarchical File System (HFS, HFS+), and such a system is susceptible to corruption, accidental formatting, deletion, virus attacks and other events.
How to use the Disk Drill mac data recovery software
The Disk Drill software allows you to do a partition recovery on Mac machines running Mac OS X. The process is very simple, and there’s actually very little that the user needs to do to effectively recover lost, corrupted or otherwise inaccessible partitions on their Mac.
Disk Drill uses several steps to achieve data recovery on Mac OS X machines.
The first is to fully locate or rebuild a catalog of the missing partition or partitions. It does that by first scanning the disk for accessible partitions. If a certain partition is inaccessible, Disk Drill uses three very effective and powerful utilities to get the job done.
The first is called the Universal Partition Search, which basically recovers deleted Mac HFS+, FAT and NTFS volumes and creates virtual partitions of whatever it finds missing.
The second is a Scan for Lost HFS+ Partition feature that helps locate and rebuild HFS+ partitions.
If a partition won’t mount correctly, there’s the self-explanatory Rebuild HFS+ Catalog File as a final option.
Once the catalog of the lost partition has been rebuilt, you can proceed to the next step, which is the macOS data recovery part of the operation.
The process for catalog rebuild and partition recovery on Mac using Disk Drill is very simple and intuitive:
First, you Download Disk Drill for Mac and install it on your system the way you would any other software.
Second, if you’re recovering from an external location, connect that particular storage device to your Mac.
Third, run Disk Drill and select the disk from which you need to recover the partition.
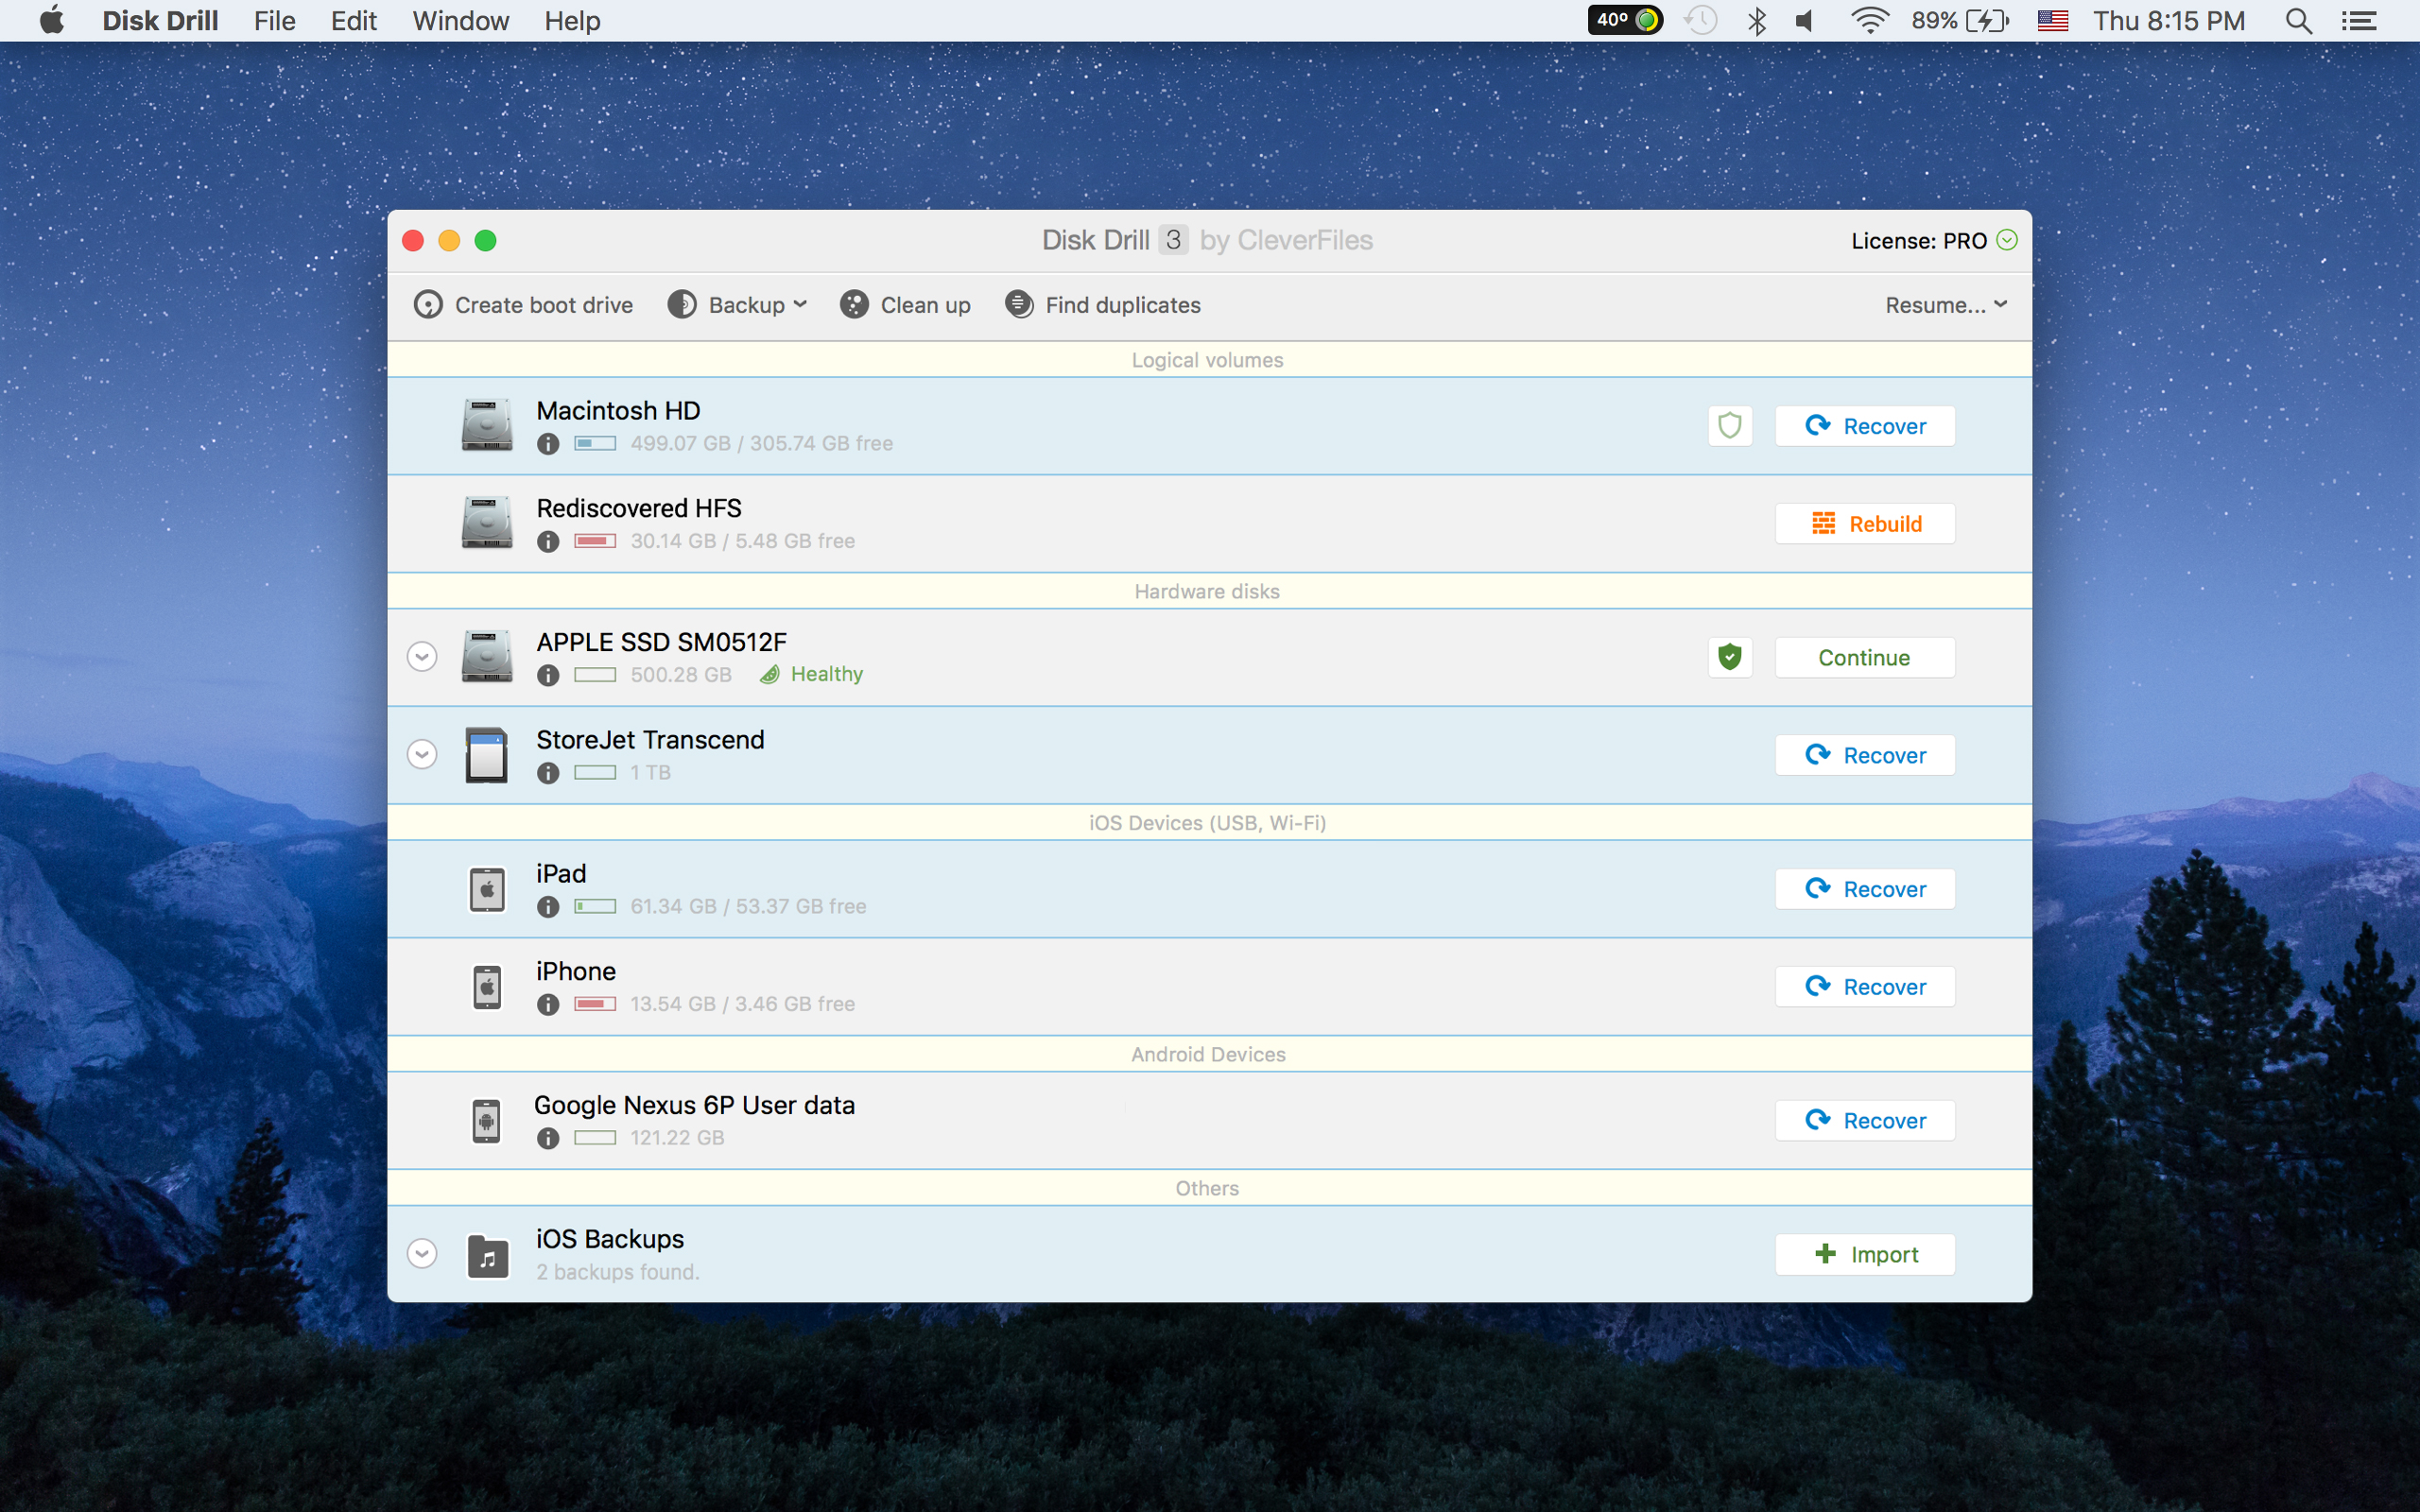
Once you’ve selected the disk and it has been scanned, you’ll see options to recover or rebuild partitions within the Disk Drill interface.
You may also choose to recover data from unpartitioned space on your disk. Such space will appear as “Unallocated” or “Not partitioned”, from where you can then choose to recover your lost data.
The free download version is pretty powerful in itself and will help you do all the basic data recovery tasks. If you’re a power user, though, you may want to consider upgrading to the PRO version.
The interface for Disk Drill is an extremely user-friendly mac data recovery software application, but it’s a powerful tool that will help you recover your most valuable data when no other solution seems to work.
+++ + +++